Create a Learning Plan
- 03 Jul 2024
- 6 Minutes to read
- Print
- DarkLight
- PDF
Create a Learning Plan
- Updated on 03 Jul 2024
- 6 Minutes to read
- Print
- DarkLight
- PDF
Article summary
Did you find this summary helpful?
Thank you for your feedback!
Learning Plans and Teaching Plans
A learning plan is the document written by the instructor for the learner. It is designed to help your learners navigate through the learning process. A learning plan links competencies and learning objectives with learning activities and performance assessments. In other words, a learning plan links what learners will learn to do, with how they will learn, and when they will know they have successfully demonstrated the competencies. Teaching plans are created for the instructor to go along with the learning plan. They suggest what the instructor will do to facilitate learning.
Video Help
View this video tutorial on how to create Learning Plans.
Learning Plan Versions
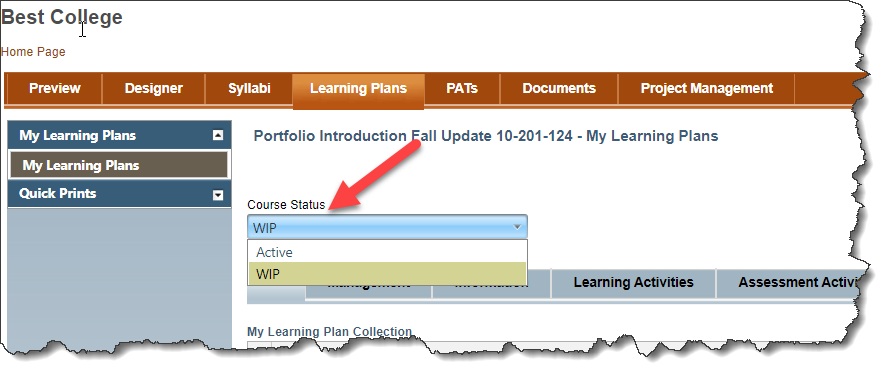
Learning plans are designed for specific versions of a course. Use the Course Status drop list to select the course version for learning plan development. That will allow you to link your learning plans to competencies from that version. If necessary make a Copy of a learning plan from a previous version to begin. (See how to copy below.)
There are two grids on the learning plan List tab.
- My Learning Plan Collection: These are the learning plans that belong to you and are not part of the general course collection. These learning plans are only visible to you. All learning plans start here.
- Course Learning Plans: These learning plans have been designated as belonging to the course. These learning plans are visible to everyone who teaches this course. You may not be able to edit these learning plans unless you have the right role.
At the top grid you can select Add, Import or Copy learning plans.
- Add: Create a new learning plan.
- Import: Copy a learning plan from another course in WIDS.
- Copy: Copy one of your learning plans or a learning plan shared by someone else typically as a starting point for a new learning plan.
WIDS presents a text box for you to add a title for your learning plan. Since a learning plan is generally created for a single competency or two related competencies, you might want to give it a title descriptive of the competency. For example, if the competency is, “Tailor a presentation to a specific audience” you could title the learning plan “Audience Analysis.”
Select the learning plan title in the grid to begin developing it. Or simply click on the Information tab and select the learning plan title from the dropdown list.
Information Tab
When you click the learning plan title, WIDS opens the Information tab. (The Management tab is mostly read-only data—although you may enter Development Notes there.)
Click Add Target Competencies to link your learning plan to one or more competencies.
WIDS opens a dialogue box with the competencies for the course. The dialogue box shows the competencies you entered in the course outcome summary. Select the competencies your learning plan will focus on by checking one or more boxes. To view the related performance standards and learning objectives, click the plus sign next to the competency.
Tip: You cannot add or edit competencies here. You must do that in the Course Outcome Summary tab.
Enter the overview or purpose for the learning plan. The overview is written directly to the learners and provides an orientation to the learning plan. The intent is to hook their interest and motivate them to complete the activities in the learning plan. This will print at the top of the learning plan as an introduction to it.
Learning Activities
Learning Activities
Learning activities represent the actions learners take to learn the competencies identified in the learning plan. They should guide learners through the learning cycle. Examples:
- Read chapter 5 in the text.
- View the video on Land Management.
- Participate in a discussion on soil surveys.
- Complete the soil survey assignment.
Select the view of the learning plan activities grid.
- Learning: View the learning cycle and the learning activity.
- Teaching: View the learning cycle, learning activity, learning materials, and teaching notes.
- Detail: View all available data.
Tip: You can design in any of the views. The view always defaults to Learning when returning to this page.
You can add learning activities in three ways:
- Add New Learning Activity: WIDS presents a dialogue box where you can enter the cycle, the learning activity statement, the teaching notes, learning materials and learning activity properties.
- Import Learning Activities from Text: WIDS presents a dialogue box where you can enter or copy and paste multiple learning activity statements. Note this only allows entry of learning activity statements—you cannot add teaching notes, learning materials, or learning activity properties this way. You can add them later by editing each activity.
- Import from the Library: WIDS presents a dialogue box where you can copy learning activities from the WIDS Learning Activity Library or import from another course in WIDS.

Add a New Learning Activity
- Click Add New Learning Activity. WIDS presents a dialogue box for data entry.
- If desired, select the phase of the learning cycle from the Learning Cycle dropdown list.
- Enter the learning activity statement. (This is what you want the learner to do. For example, you might enter: “COMPLETE the Speech Making Wheel handout.”)
- If desired, enter your notes for leading the activity in the Teaching Notes box.
- Optional: Complete items on the Activity Detail tab.
- If desired, upload or designate related learning materials (handouts, presentations, websites, etc.) in the Learning Materials tab.
Import a Learning Activity from the Library
To help you design learning activities, WIDS includes an extensive learning activity library. You can use these as starting points for your own learning activities.
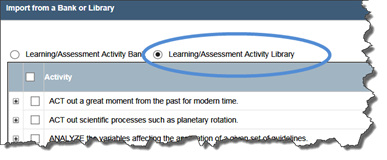
- Click Import from a Bank or Library. WIDS opens a dialogue box.
- Select the Learning/Assessment Activity Library at the top of the dialogue box.
- WIDS presents a dialogue box with a variety of learning and assessment activities. You can search the library using the search criteria at the bottom of the library dialogue box.
- To add an item from the library, check one or more activities and click Save.
Assessment Activities
Assessment Activities
Assessment activities represent the assignment learners complete or submit to demonstrate achievement of the competencies in the learning plan. A learning plan may have more than one assessment activity. Assessment activities might reference a WIDS Performance Assessment Task. Examples:
- Submit the Audience Analysis form
- Complete the Audience Analysis performance assessment task
Click Add or Import to add one or more assessment activities to your learning plan.
Learning Materials
When you enter learning materials in your learning or assessment activities, they are compiled in the Learning Materials tab. Learning materials can also be added directly here. Click Add Learning Material. WIDS presents a dialogue box for you to complete.
If desired, upload documents that support your learning activity. Acceptable document types include Word, PowerPoint, Excel, PDF and Zip.
Tip: WIDS automatically stores documents that are uploaded as learning materials in the Documents tab. Your personal documents are located in the My Documents page in the My Learning Materials folder in a subfolder with the same name as the learning plan. If the learning plan is designated as a “course” learning plan, the related documents are in the Shared Documents page in the Learning Materials folder in a subfolder by learning plan.
Print Learning and Teaching Plans
Select the Quick Prints section from the left navigation in WIDS. WIDS presents several report options for printing. You can print directly from the page, export the reports to your computer, or save the reports in the WIDS Documents tab.
- Learning Plans: Print one or more Learning Plan Reports
- Teaching Plans: Print one or more Teaching Plan Reports
- Learning Materials; Print the learning materials list for one or more Learning Plans
1. Generate the report on the page.
2. Use the Show/Hide Options dropdown list to see what data is included in the report by default. Click the plus sign to expand te view of a report section. To remove an item or section from the report, click the checkbox to the left of the item to unmark it. To add an item that is not checked, click the box to include it.
3. Click the refresh button to update your view of the report. .png)