Project Documents
- 18 Aug 2023
- 2 Minutes to read
- Print
- DarkLight
- PDF
Project Documents
- Updated on 18 Aug 2023
- 2 Minutes to read
- Print
- DarkLight
- PDF
Article summary
Did you find this summary helpful?
Thank you for your feedback!
WIDS projects include a Documents tab for saving, storing, and managing curriculum-related documents.
Manage Documents in the Documents Tab
The document pages in WIDS are designed to serve as a one-stop location for saving, storing, revising retrieving, and sharing curriculum-related files. The page layout uses a common, nested folder/files framework. Page functionality allows you to create folders and upload files.
Navigate Documents Folders
You can navigate among the folders, move folders and files, change folder names, and delete folders and files. There are several icons on the Documents page:
| Add a folder. Hint: You can create blue folders. Yellow folders are generated automatically by WIDS. |
| Add an item. (Items can be added to blue folders only. WIDS adds items to yellow folders automatically when they are uploaded to select pages in the software.) |
| Change the name of the folder. |
| Move the folder to another folder on this page. |
| Delete the folder. |
| Navigate up one folder level. |


Select View Options
Select View Folders and Files to see the folder structure in a tree view.
Share Documents
Items in the Documents tabs can be made available to others without logging into the WIDS application. Simply right-click on the document icon to obtain the public URL.
Yellow Folders
Yellow folders are created automatically by the WIDS software. They store documents that have been uploaded elsewhere in the application. If you delete the document from its source, it will be deleted from the Documents tab also.
Tip: You cannot delete yellow folders, add documents to them, or delete documents from them. You can however, overwrite the document to replace an existing document with a newer version.
In the Program module there is a yellow folder on the Shared Documents page called Assessment Plan Documents. These store documents that have been uploaded in an outcome assessment plan. WIDS creates a subfolder for each assessment plan.
Save Reports to Documents Tab Folders from Quick Prints Pages
When you generate a report from another tab in WIDS, you can save it to one of the pages in the Documents tab.
Tip: You must save documents in a folder. If a folder has not been created, you have the opportunity to create one when you Save in WIDS. You will be asked to select an existing folder or Add New Root Folder
Move Files or Folders
You can move files to other folders in the document library. You can also move an entire folder of files to another project of the same type (you can move a program folder to another program or a course folder to another course).
Tip: Documents can be moved. They cannot be copied.
- Click Move next to the filename or folder.
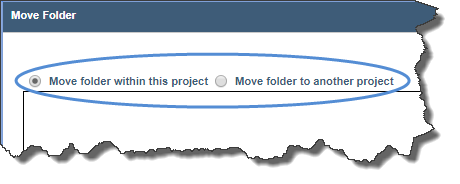
- WIDS opens a dialogue box. Select the destination:
- Move to another screen within this project
- Move to another project of the same type (course folders can be moved to other courses, program folders can be moved to other folders)
- If moving to another project, search for the project by entering a keyword in the project title or the project number.
- Select the screen and/or folder destination.
- Click Save.
Obtain the URL for a File
Each file on the document repository has a unique URL (web address). To obtain the URL, right click on the document icon. This URL is public and can be shared with users outside of the WIDS application. They do not have to login to WIDS to view the file.
Delete Files and Folders
Folders and files can be deleted.
- Click Delete next to the folder or filename.
Tip: You can only delete empty folders. WIDS will not allow you to delete a folder with files in it.